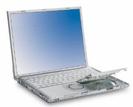
This computer is awesome,
but difficult to open.

Pull cap off of right side
of keyboard

Remove screws to right of keyboard.

Remove small screws
under right side of keyboard

More screws
next to keyboard

Pull off ground screws
on this small connector

Remove small screws
under left side of keyboard

Remove small screws
at top of DVD

I pulled back
the waterproofing. No more spilling water on the keyboard for fun! I might eventually try to glue it down later or see if I can get replacements. I'm not sure this step was necessary. I think there's a screw under the waterproofing on the left side that needed removal.

The waterproofing doesn't
re-seal very well.

Peel up the small seal
to disconnect the keyboard.

Putting back the keyboard

Pulling the case apart,
looking in towards the fan

The culprit,
my fan had gone bad.

Use the release switch
to open the DVD door.

Pop off the cap
on the side of the DVD

Remove ground screws
for this plate.

Use a small flathead,
pop the DVD door all the way open (past the normal latch catching mechanism).

Remove screws
along left side of door.

Remove small screws
inside DVD door.

Remove small screws
on bottom of the computer towards the front.

We can start to remove
the entire top section, but you'd need to disconnect a bunch of connectors in here.